The Complete LearnDash + Swarmify Guide for LMS Video Hosting
LearnDash + SmartVideo is the ideal combo to sell courses with video content. LearnDash offers you the perfect system to sell courses, and Swarmify helps you to accelerate your videos.


LearnDash + SmartVideo is the ideal combo to sell courses with video content. LearnDash offers you the perfect system to sell courses, and Swarmify helps you to accelerate your videos.
I think you'll agree when I say creating courses with video content on WordPress is challenging.
There are many things to consider, which can be an arduous task even for the best of us.
For instance, you need an easy system to create, sell and manage courses. You also need a way to enroll, manage and award learners.
All of this is confusing especially to beginners that lack technical knowledge to configure a learning management system (LMS) on WordPress.
Enter LearnDash LMS and the day is saved.
In today's post, we show you exactly how to sell video courses (or any other course with video content) using LearnDash LMS and the Swarmify SmartVideo plugin.
What is LearnDash?

LearnDash is one of the best learning management systems for WordPress. Available as a plugin, LearnDash LMS is easy to install, configure and use.
It ships with a ton of features that make creating courses, lessons, topics, and quizzes a breeze. On course completion, you can even offer certificates to your students automatically.
To keep your learners motivated, LearnDash comes with a reward system that allows you to award points and badges to encourage students.
On top of that, LearnDash is compatible with all modern WordPress themes, meaning you don't need to do any custom coding to get the LMS working.
It's a great LMS solution for many big-name brands and major institutions such as the University of Michigan, OptinMonster University, Yoast Academy, Infusionsoft (Now Keap), and WPElevation, just to mention a few.
Key LearnDash Features
The LearnDash LMS is best known for the following key features:
- Powerful course builder to create dynamic learning experiences
- LearnDash Focus Mode, which allows you to white label your e-portal
- Advanced quizzes with eight question types, question banks and more
- Drip-feed lessons according to a schedule
- Dynamic forums for your enrolled users
- PayPal, Stripe and 300+ payment gateways
- Offer one-time payments or subscriptions
- Advanced user profiles
- The incredible ProPanel dashboard
- Email notifications
- Certificates and badges
- Memberships
- And so much more!
If you're looking to create a course on your WordPress website, you can never go wrong with LearnDash. It's a premium plugin meaning it's not available on the official WordPress.org plugin repo, although you can find hundreds of free add-ons on there.
That being said, what is Swarmify SmartVideo?
What is Swarmify SmartVideo?

If you're new around here, Swarmify is our proprietary video acceleration service that runs on the same infrastructure that streaming heavyweights such as Netflix and Hulu use.
Our mission is to offer you instant-start and 12x faster video loads without lagging or buffering. Our dedicated video CDN ensures that your customers enjoy ultra-fast video speeds and high-quality video playback no matter where they are in the world.
Using our in-house EdgeAI, we deliver consistent performance and professional video experiences to a wide range of businesses as seen in our case studies.
In short, we are smack at the center of the video acceleration business, and our Swarmify SmartVideo plugin is how we reach the ever-growing and ever-evolving WordPress market.
SmartVideo Key Features
Swarmify SmartVideo is growing popular each day thanks to:
- Clean, clutter-free and distraction-free video player that is way better than YouTube's (now you don't have to deal with YouTube's branding and links that siphon traffic from your courses)
- Instant start- SmartVideo videos start playing 12x faster than other players on average (see our demo here)
- Optimized viewing experience on every device, which is especially useful if you offer courses to learners using different devices
- Automatic YouTube conversions - If you already host videos for your courses on YouTube, SmartVideo converts all the videos automatically
- Continuous streaming optimization - Throughout playback, SmartVideo continuously monitors the video experience of each individual user and prevents failures before they occur.
- Stall-free playback - SmartVideo offers you 8x less buffering during playback than other players on average. Who wants to watch a video course that buffers? No one!
- Unlimited everything - You get unlimited bandwidth and storage to stream high-quality videos on your WordPress LMS
- Professional support backed by a team of super-smart and passionate developers
- Easy installation and implementation
- And we're just getting started :) Read more about our features here
If you'd like to offer fast and high-quality video experiences to your learners, SmartVideo is a no brainer. If you use LearnDash, our SmartVideo plugin allows you to accelerate your videos in a matter of minutes, automagically. In other words, SmartVideo is video hosting for LearnDash redefined.
With our solution, you enjoy faster videos, better user retention, boost engagement and increase revenue from your courses. Don't take our word for it; ProDigi gained over 20,000 students after implementing SmartVideo video hosting for online courses.
With that preamble, let's delve deeper and create a sample video course using LearnDash and SmartVideo. Again, LearnDash allows you to create and sell courses, and SmartVideo helps you to boost the speed of your videos tenfold.
Video Hosting for WordPress LMS: Creating a LearnDash Course
Firstly, you must install and activate LearnDash, as well as Swarmify SmartVideo for the next section. Here's how to install LearnDash, and here's a quick walkthrough for the SmartVideo WordPress plugin.
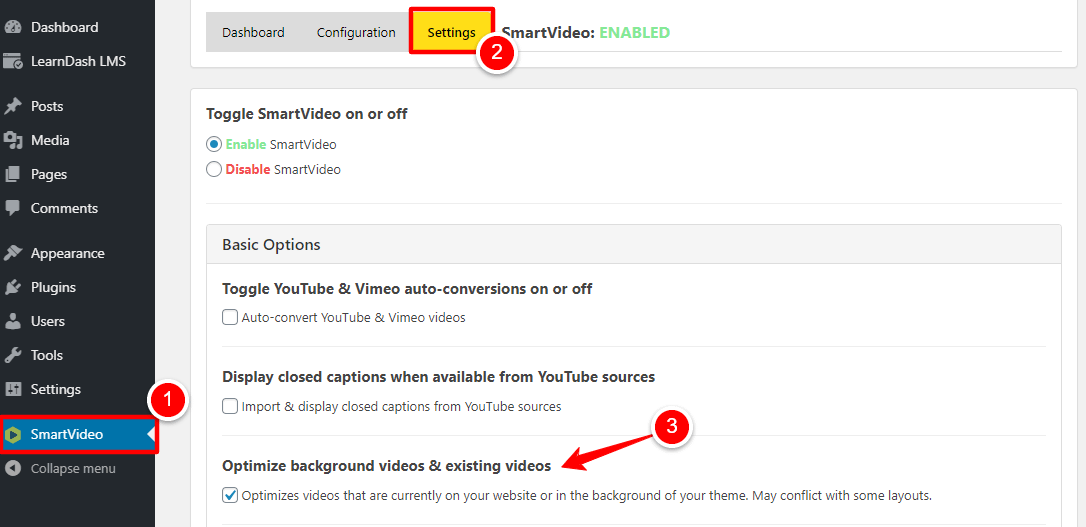
Firstly, Optimize Background & Existing Videos
Before you do anything else, toggle on Optimize background videos and existing videos in SmartVideo settings.
How?
Log in to your WordPress admin dashboard and navigate to SmartVideo > Settings > Optimize background videos and existing videos:
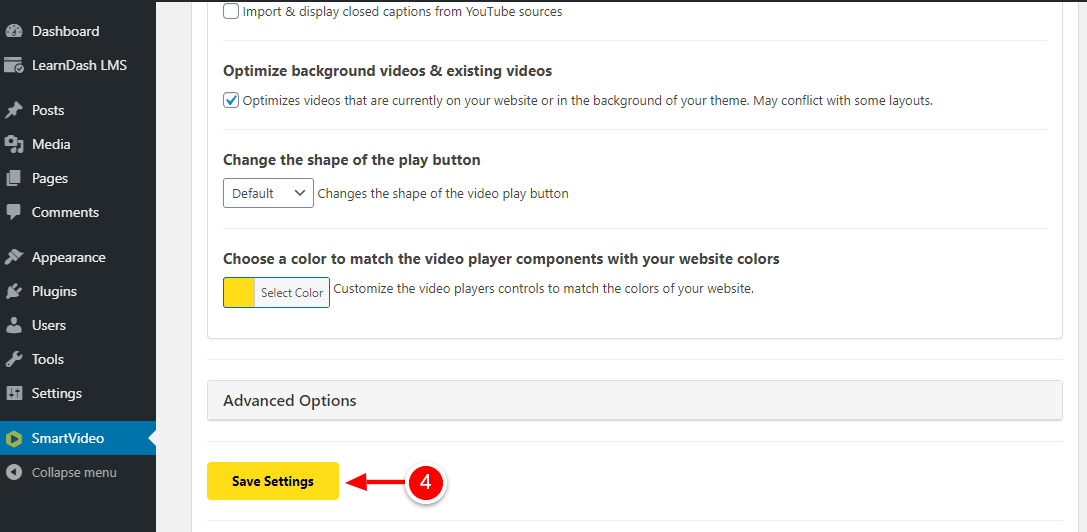
After that, scroll to the bottom of the page, and hit the Save Settings button, as shown below.
If you have LearnDash and SmartVideo ready, let's start creating a simple course.
Adding a New LearnDash Course
Having fun yet? Great!
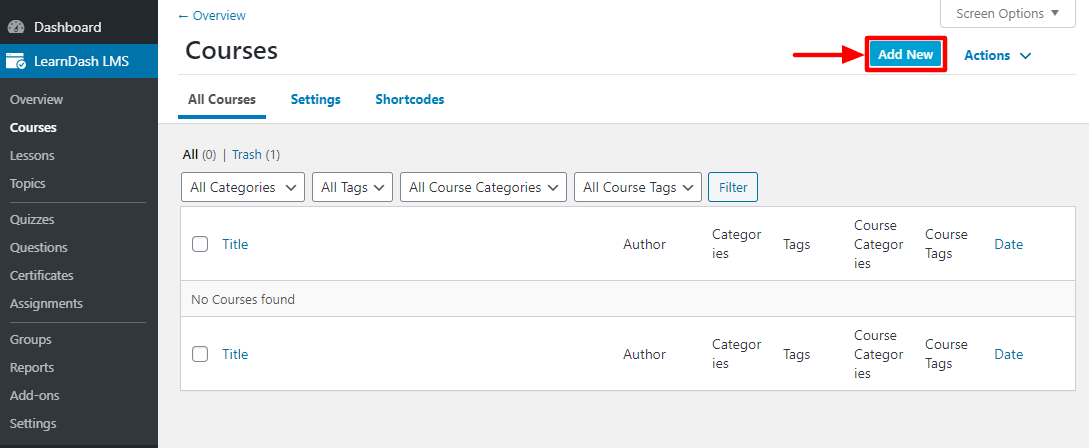
Back in your WordPress admin dashboard, navigate to LearnDash > Courses, as we highlight below.

Next, click the Add New button at the top. If you're an existing LearnDash user, you're already familiar with the process:
On the Course Page, add your Course Title and some introductory text.
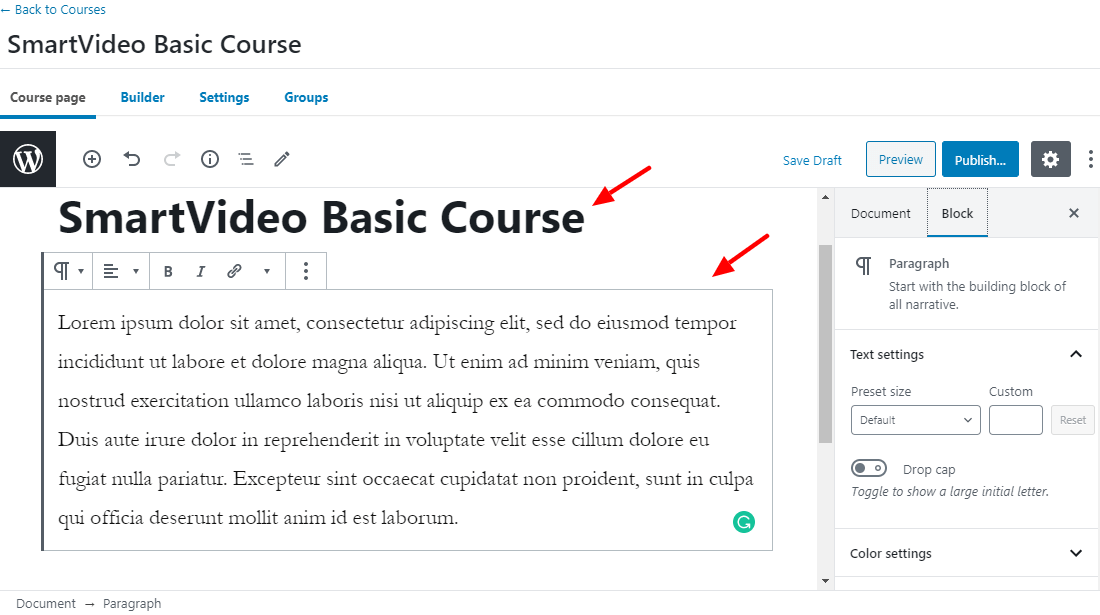
You may even add a SmartVideo video here to introduce your course instead:

Which leads you to:
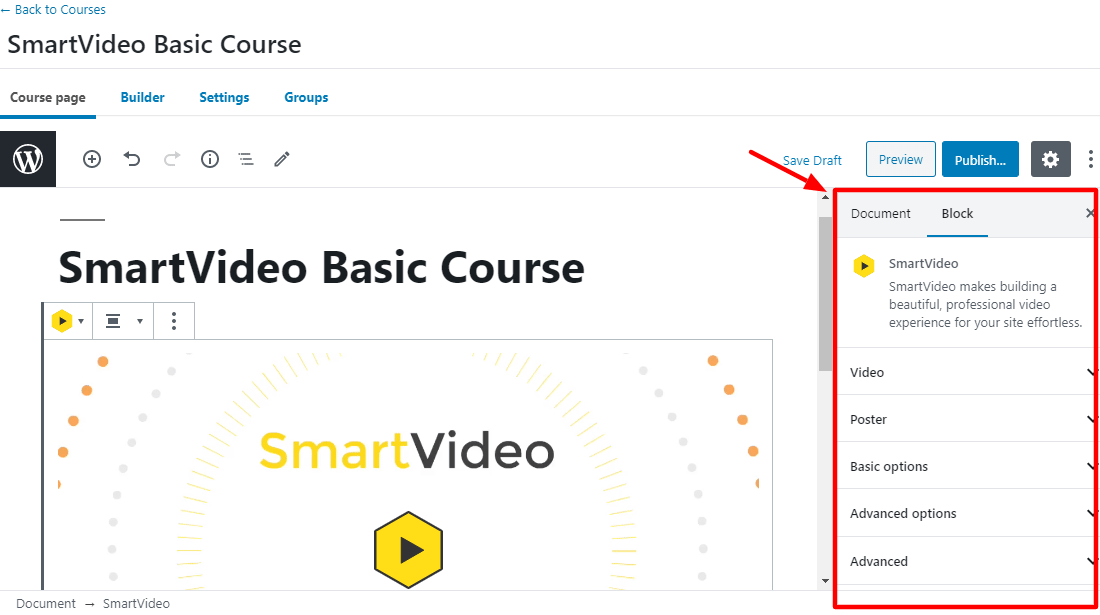
Note the highlighted box in the above screengrab:
- Video - Choose your video source. Could be WordPress media library, YouTube, Vimeo, or another source
- Poster - Add a custom poster image. If you don't set any poster image, SmartVideo picks the first frame from your video
- Basic options - Set width, height, autoplay, muted and loop
- Advanced options - Toggle on/off video player controls, play videos inline (for iOS Safari browsers), and responsive design
- Advanced - For additional CSS classes
Also note that we are using the Gutenberg editor for our example. However, SmartVideo is also compatible with the classic editor, Beaver Builder, Divi and Elementor. We also offer seamless integration with Squarespace, Shopify and others.
Are you learning something here today?
I hope so. Moving on swiftly.
How to Design a LearnDash Course
Click the Builder tab to start designing your course:
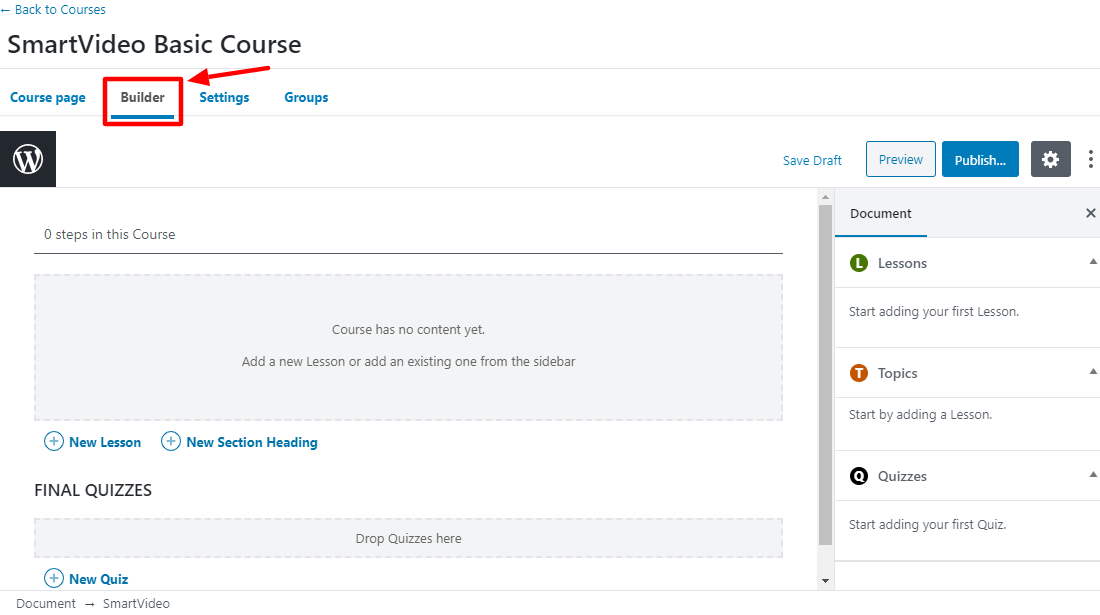
Our course is blank as of now, but not for long. Here's what to do next.
Click New Section Heading:
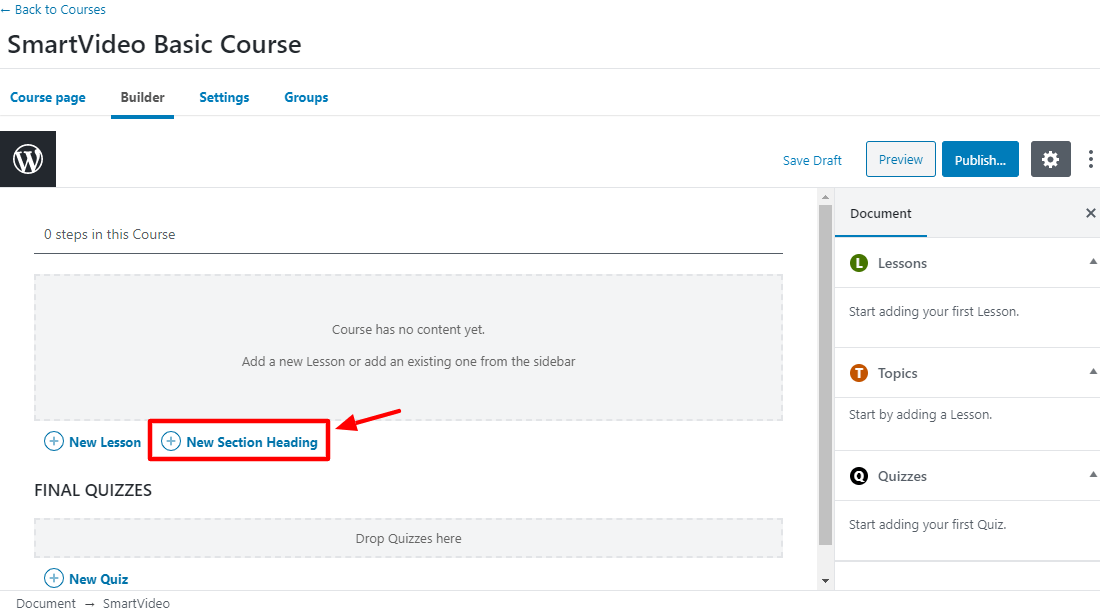
Next, add your section heading. We shall call this one Introduction, and hit the Add Section Heading button:

Voila! Now we have new section heading in the redesigned LearnDash course builder:

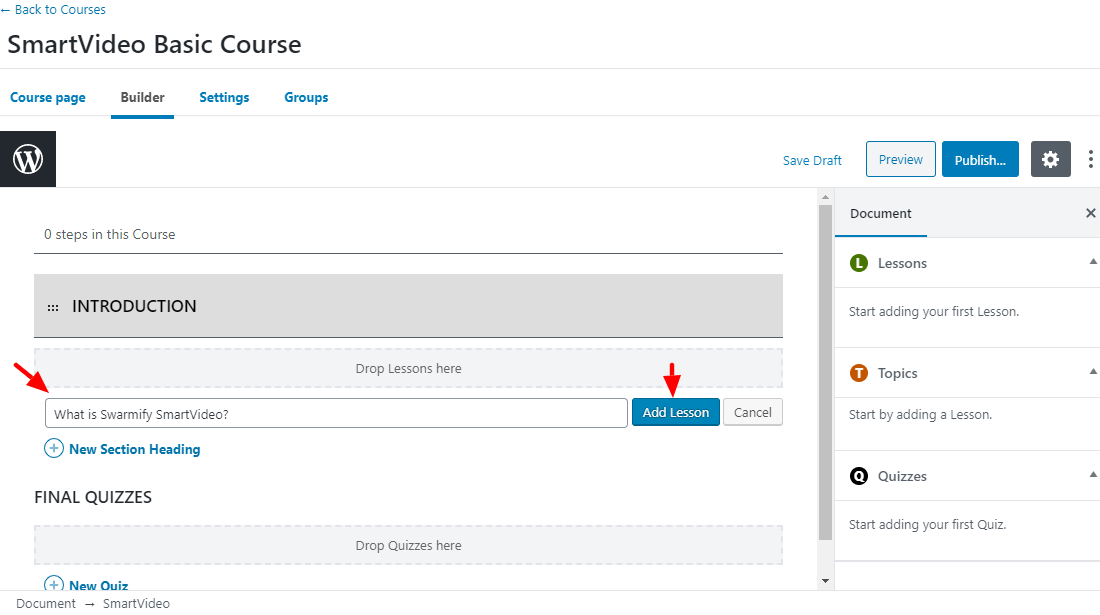
Now, let's bump things a bit and add our first lesson :) Click the New Lesson button, as we detail below:
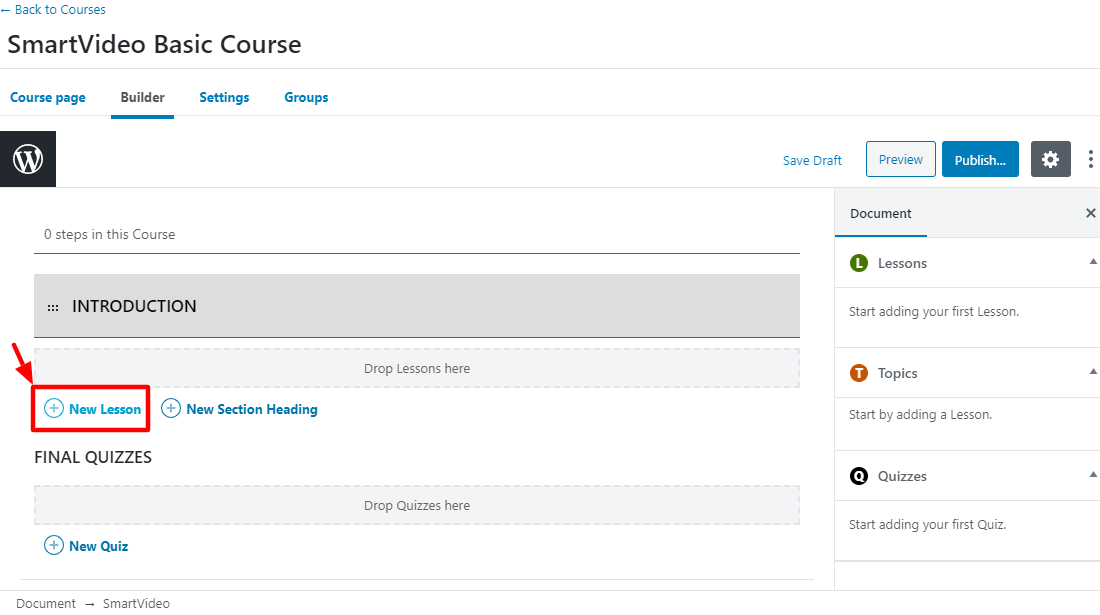
After that, enter a title for your lesson and click Add Lesson:
So far so good, you're doing incredibly well. You're a fast study.
You can add text content to your lesson, a SmartVideo video, or any other media supported by WordPress. For our tutorial, however, we are adding some text, and a Swarmify video.
Also, always remember to click the Save Draft button to avoid losing your changes accidentally.
Next, mouse over the lesson you just created, and hit Edit:
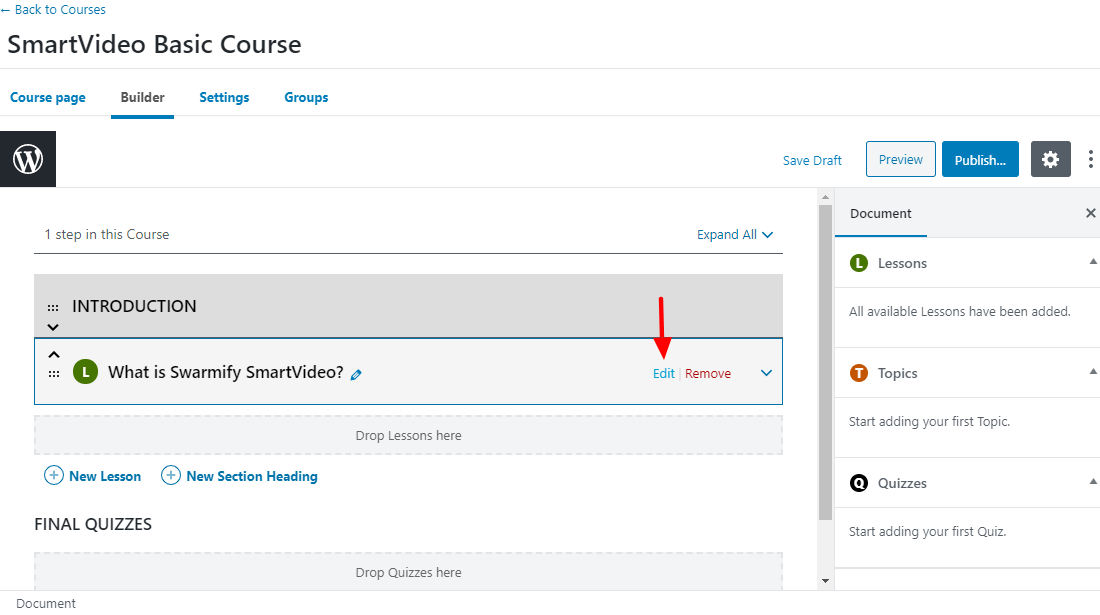
Doing so leads you to the lesson page so you can add your content:

Isn't it brilliant and so easy to use?
Let's add a smart video, and some text below it for our first lesson.

For the tutorial, I borrowed a video from AppSumo's YouTube channel, but as you can see in the image above, it's already converted into a SmartVideo player. No YouTube branding and no links back to YouTube whatsoever. Also, note where I placed the video link in the Video block to the right.
Pro Tip 1: If using YouTube, use the embed link e.g. https://youtu.be/k0Vzt-NGjT4 instead of the direct link i.e. https://www.youtube.com/watch?v=k0Vzt-NGjT4. For Vimeo, make sure you are using the embed link like this: https://player.vimeo.com/video/445319847 instead of the direct page URL like this: https://vimeo.com/445319847
Pro Tip 2: If your YouTube videos are set to Private, change that to Unlisted instead
NB: Inside the lesson page, you can add:
- Featured image for your lesson page
- Tags
- Categories
- Lesson tags
- Lesson categories
- Post attributes
Next, click the Settings tab at the top to toggle on the Video Progression feature:
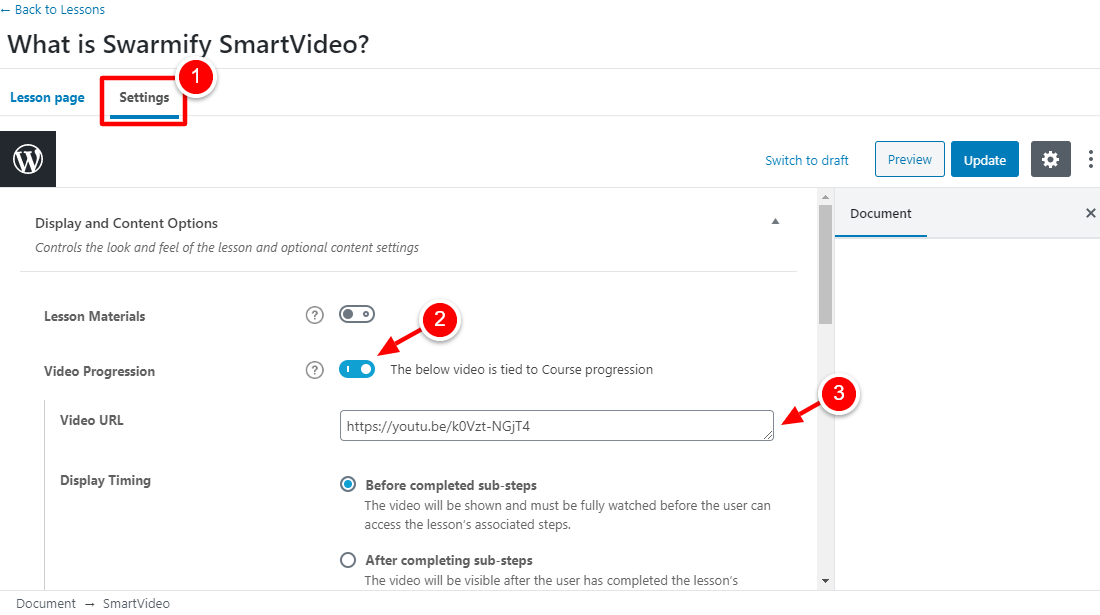
The video progression feature forces learners to watch the video fully before the user can access the lesson's associated steps. Here, more details about the image above:
- Click here to open Settings
- Toggle on video progression
- Enter the same video URL you added to your lesson earlier
NB: Below the video progression feature, there are several other settings including:
- Autostart
- Video controls display
- Video pause on Window unfocused
- Video resume
- Assignment uploads
- Forced lesson timer
- Lesson release schedule settings - immediately, enrollment-based, and specific date
After that, click the Update button at the top:
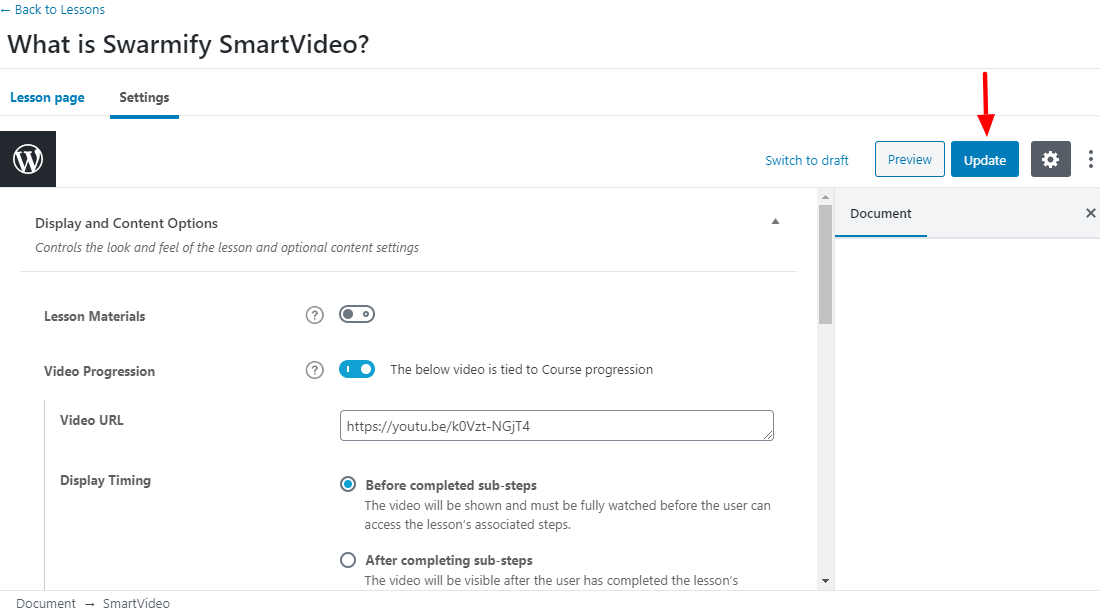
Now, if I view my sample lesson in the front-end, I see this:
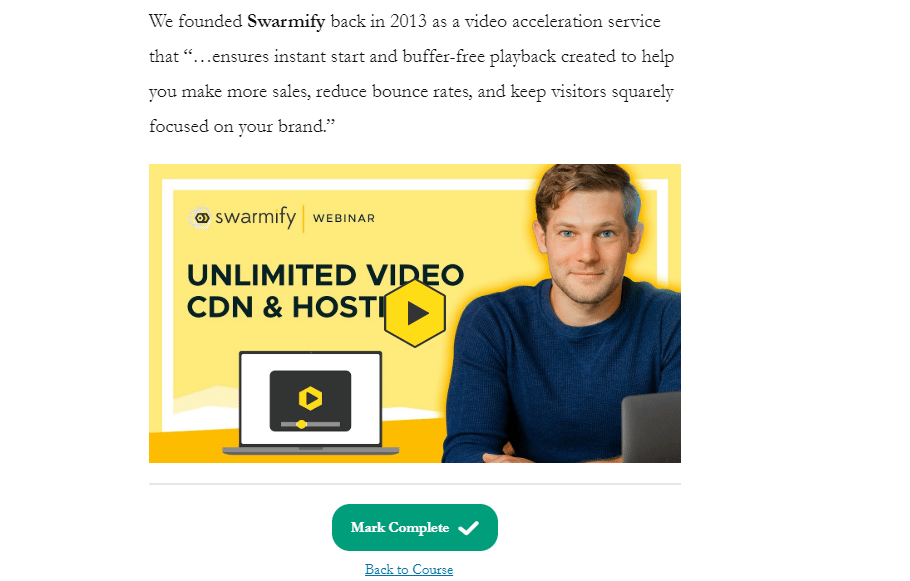
My lesson page complete with an accelerated SmartVideo video player! How suave?
You'd follow the same procedure whether your video was hosted in the WordPress media library, Vimeo, Amazon, Google Drive, or elsewhere. Swarmify SmartVideo will continue accelerating your content in the background.
If you have existing videos in your courses, SmartVideo starts accelerating them automatically when you toggle on Optimize background videos and existing videos.
Note that your videos are optimized in 1.5x to 2x the length of your video. Longer videos will take longer to optimize, but other than that, there is absolutely nothing to worry about :)
Now, go ahead, add more SmartVideo video lessons, and publish your course, and let us know how that goes. We guarantee you a faster video experience and happier students from the get-go.
Oh yeah, here's how my SmartVideo Basic Course looks on the front-end, complete with our single lesson, and the intro video I added earlier. I didn't choose the text intro after all lol:
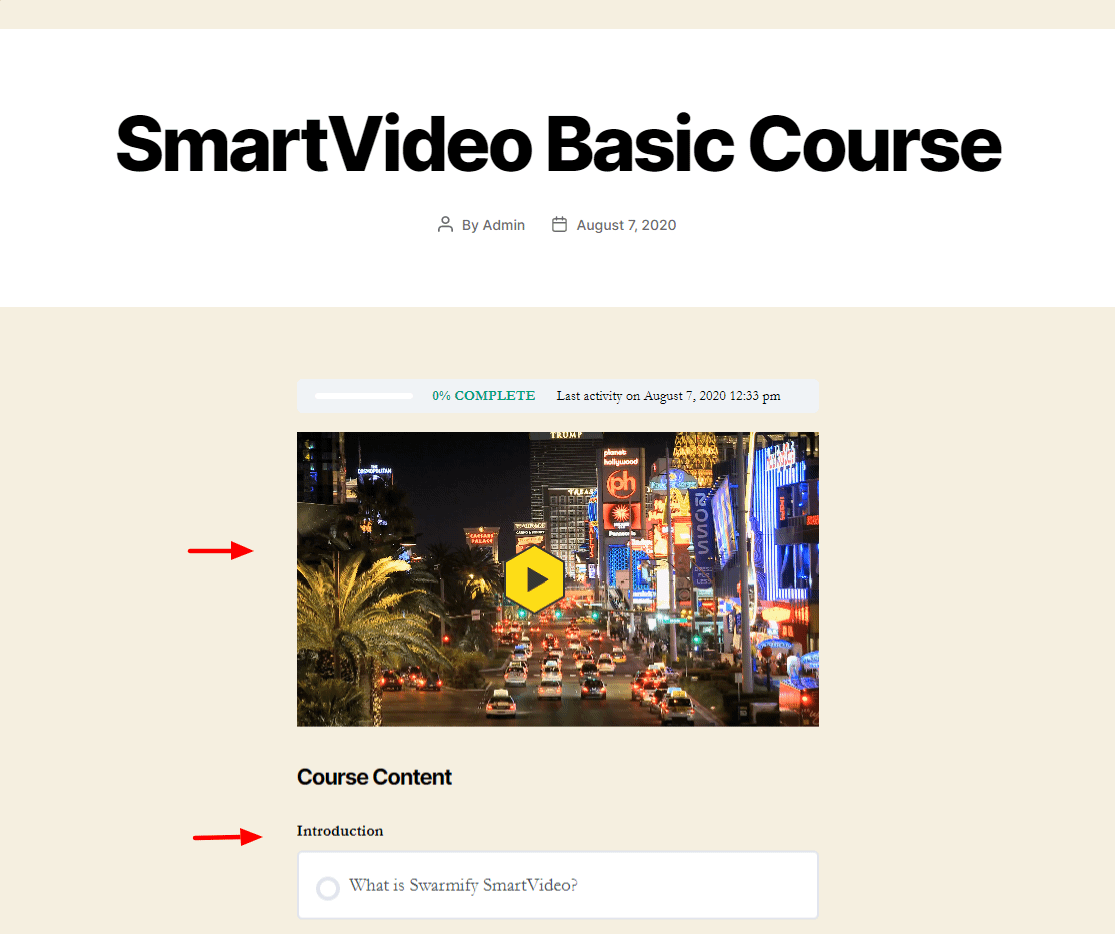
Not bad, right? I was using the default Twenty Twenty theme, and the latest versions of LearnDash and SmartVideo.
Conclusion
SmartVideo and LearnDash offer you the perfect solution you need to create super-fast video courses on a budget. Both plugins offer you all the tools you need to create remarkable courses, while accelerating video content to deliver instant-start and buffer-free videos to your students.
On top of that, your videos will look and perform well across multiple devices. And if you're using a third-party video sharing site like YouTube, you can now say goodbye to stubborn branding, recommended videos, and links in your video courses.
